Check out our Youtube Tutorial on How to Clean & Optimize 3D Scans in MeshLab!
Preparing a Polycam Capture for Meshlab
Hello, everyone. Today, I'm gonna walk you through how to export a capture from Polycam and bring it into Meshlab for some cleanup and optimization. This capture was made by the user Easy 360. This account has tons of amazing captures, and I think that they are one of the most elite Polycam users. Before exporting, I like to handle the rescaling inside of Polycam. To do that, click the measuring tool and mark out a measurement of something that is a known or standard length. For example, I'll take something familiar like a parking space and set it to an average size of about two point four meters. Once I've entered that, I just tap Rescale, Save, and then Sync Capture.
Exporting and Importing the Mesh
Now let's export. Go to Details, Download 3D Model, and choose the OBJ format. With Meshlab open, go to File, Import Mesh, and choose the mesh you just downloaded. I like to double-check that the scale came through correctly. To do that, click the measuring icon, the little tape measure, and measure the same distance that we used earlier. If it matches, we're good to go.
Cleaning and Preparing the Mesh
To help the remeshing algorithm that we'll do later, go to Filter, Cleaning and Repairing, and Merge Close Vertices. This will help us in the later decimation. It's important to note that Meshlab does not have an undo function. So before making more changes, right click in the Layers panel and select Duplicate Layer. That way you always have a backup.
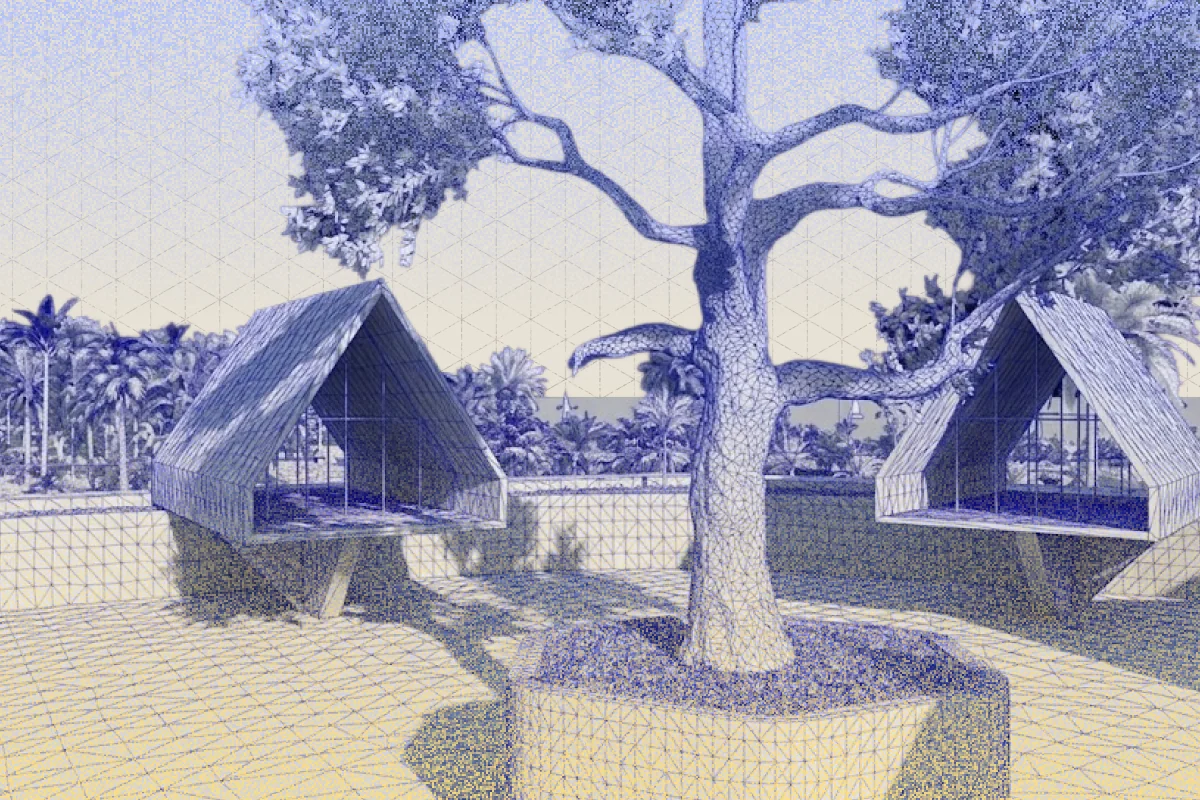
Inspecting Mesh Topology and Shading
For inspecting the mesh topology, I recommend checking out the radian scaling render mode and toggling between face shading and vertex shading. Also, to render the meshes as unlit, which is the same way that you see them in Polycam, set the shading mode to None.
Optimizing UV Maps
To bring up the UV map, go to Render, UV Texture Parameters. And notice how there are thousands of tiny little UV islands? This can be simplified and make editing the texture later a little easier. Let's simplify these UVs using texture defragmentation. Go to Filter, Texture, Texture Map Defragmentation. Setting the UV length target as a lower decimal will help give you more simplified UV islands, but it will take longer to compute. This setting of zero point two five took me about two or three minutes to process. Once it's done, you'll notice that the UV map is much cleaner and easier to work with.
Managing Mesh Layers and Views
To toggle the visibility of mesh layers, simply click the eye icon to the left of the mesh in the Layers panel. To get an orthographic top-down view, go to Windows, View From, Top.
Reducing Polygon Count
Now I want to reduce the amount of polygons in some areas while maintaining the full resolution in the main area. Use the Select tool to mark out the area you want to preserve. Then hit Q to create the selection and then I to invert the selection. Then go to Filters, Simplification, Quadratic Edge Collapse Decimation with Texture.
Recommended Decimation Settings
For most photogrammetry captures, a fifty percent reduction is a safe bet. Make sure to check Preserve Boundary of the Mesh and Simplify Only Selected Faces. Then hit Apply. Let's compare the decimation by checking on the wireframe. But first, to unselect the vertices, you need to click back into the selection tool and then hit D on the keyboard.
When you're ready
However, if you wish to decimate a lot more, you can leave the selection and simply run the filter again. For a capture like this with a lot of flat area, you may also consider trying planar simplification.
Exporting the Optimized Mesh
When you're ready to save, go to File, Export Mesh, and save your optimized mesh. Or if you want to save as a copy, choose Export Mesh As. I hope you found these Meshlab procedures helpful. This is really only scratching the surface of a very powerful mesh processing tool, and there are tons of other filters and processes to help facilitate working with photogrammetry meshes. If it's for 3D printing, industrial design, archeology, or entertainment, this program is a fantastic and free resource. I'd love to hear about how you use Polycam and Meshlab together, and if you'd like to share, please join the Polycam Discord or leave a comment. Thank you.