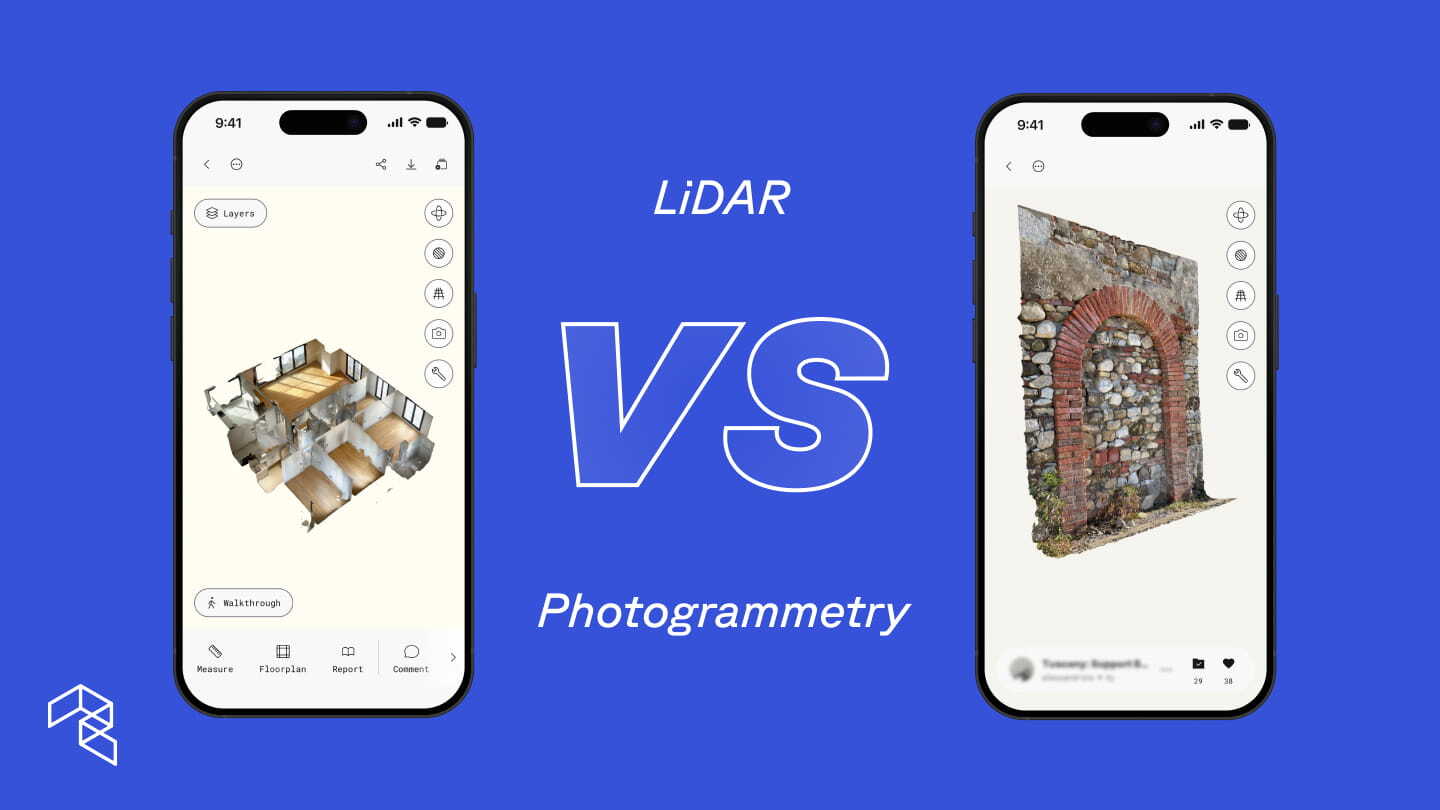

If you have an iPhone in your pocket, you're carrying more than a camera. In most cases, you're carrying a professional-grade LiDAR scanner. Whether you need a CAD-ready as-built drawing for a job site or just want to check if a sectional fits your living room, your phone can generate a detailed floor plan in the time it takes to walk across the room.
In this guide, we'll walk you through the full process in Polycam: capture the space, generate the floor plan, refine it on-device, and share a finished product with colleagues the same day.
What you'll need: An iPhone Pro or iPad Pro released in 2020 or later, and the Polycam app. Floor plan generation requires a LiDAR-enabled device & Polycam Business plan subscription.
Generating a floor plan is free. To access the Floor Plan Editor, exports, and spatial reports, start a free 7-day Business trial.
A single Polycam scan automatically produces four outputs: a LiDAR mesh, a detailed virtual walkthrough, a 3D floor plan, and a 2D floor plan with measurements and labels. The Floor Plan Editor lets you refine walls, place furniture, and adjust openings before exporting to DXF, PDF, CSV, or PNG for 2D and 3D outputs. This guide covers how to get the best results at every step.
Step 1: Capture the perfect room scan
A great floor plan starts with a great scan. Open Polycam and select either Space Mode (with the Floor Plan toggle enabled at the top left) or Floorplan Mode. Space Mode captures a full 3D model alongside the floor plan. Floorplan Mode is optimized specifically for floor plan generation.
Prep the space (5 minutes). Ensure the space is well-lit by turning on lights and opening blinds. Clear walking paths. Open interior doors so they don't block the scan. Cover or avoid large mirrors and glass, as these interfere with the LiDAR sensor.
Start in a corner. Never begin in the middle of a wall. Aim your phone at the opposite corner near the floor. This gives the LiDAR clear vertical and horizontal reference points to lock its orientation immediately and it's the single best thing you can do for scan accuracy.
Move steady and slow. The biggest cause of scan drift (where walls don't line up) is moving too fast. Walk the perimeter of each room at a deliberate pace. Polycam provides real-time feedback as you go: white outlines show floor plan boundaries being detected, and a blue grid indicates LiDAR coverage. When the blue grid disappears from an area, that section is fully documented.
Scan floor to ceiling. Don't just capture at eye level. Tilt the phone up to get ceiling corners and down to capture floor-to-wall joints. This is how Polycam calculates room height and volume, which is critical data for professionals.
If you lose tracking, stop moving and slowly pan the device around the room. Polycam will automatically relocalize and continue the scan. Here are additional tips to improve the quality of your scans in Polycam.
Multi-level scanning. Space Mode supports scanning multiple floors in a single session. Complete one level first, then move extra slowly through staircases to maintain tracking between floors. When the room is fully covered (no blue dots remaining), tap Done.
Step 2: From scan to floor plan in seconds
After tapping Done, Polycam processes the scan and generates multiple outputs from a single capture from that single session: a detailed 3D LiDAR mesh capturing every surface and texture, a clean 3D floor plan model showing walls, doors, windows, and room layout, and a 2D floor plan drawing with measurements and room labels.
You can choose between on-device processing (fast, works offline) or cloud processing (higher quality, better for complex or multi-room spaces). For a polished professional result, cloud processing is worth the short wait.
The floor plan arrives with measurements, square footage, and auto-detected fixtures already in place. Polycam's AI automatically identifies and labels sinks, toilets, bathtubs, kitchen appliances, cabinetry, and bookshelves, saving hours of manual drafting.
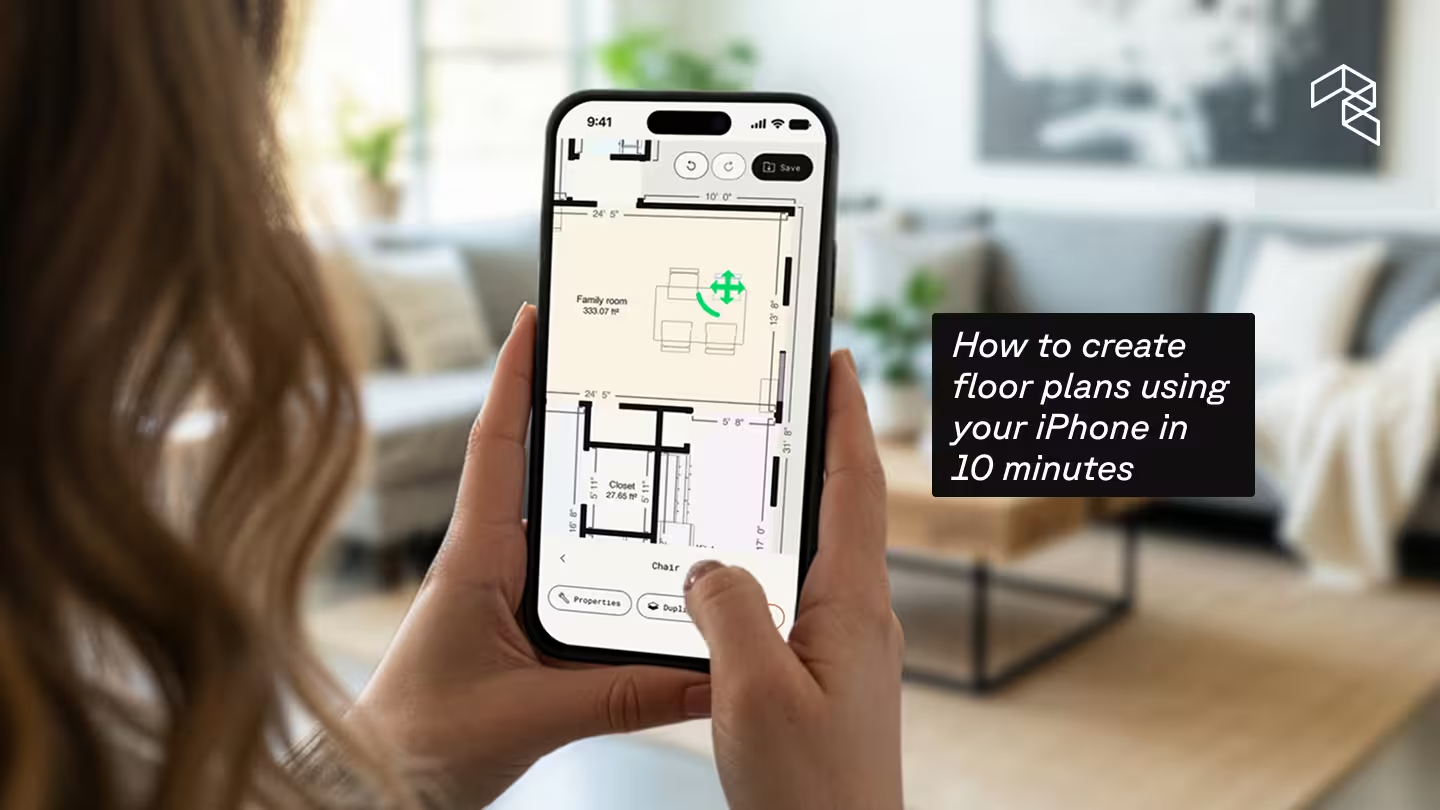
Step 3: Refine and edit your floor plan
This is where Polycam differentiates itself from every other floor plan app. The Floorplan Editor gives you CAD-style editing directly on your iPhone. Refine the floor plan while still standing in the space to validate accuracy against the physical room, or continue editing back at the office or on desktop web. Floor plans sync to the cloud automatically, so colleagues can access and collaborate from anywhere.
Adding, Moving, and Adjusting. Select any wall and adjust its position to fix slight wobbles from the scan.
Set wall thickness. Set walls to match actual dimensions. Accurate wall thickness ensures total area calculations are correct.
Add missing elements. Manually draw walls or partitions that the camera may have missed, like behind a large wardrobe or in a tight closet.
Adjust or add furniture and fixtures. Move, rotate, resize, replace, or delete auto-detected items. Need to add something the scan missed? The asset library includes 70+ objects (furniture, fixtures, and structural elements) organized by category.
Label rooms. Polycam auto-names rooms (Kitchen, Bedroom, Living Room) based on detected items. You can manually rename any label.
Every edit you make in the 2D plan updates the 3D model in real time. Toggle between views to verify the layout looks right from every angle.
Before you export, check these settings: Total Area display shows overall square footage (essential for real estate and estimating). The Compass Rose helps architects track sun orientation. Color themes let you switch between Monochromatic, Complementary, or Triadic palettes for client-ready or listing-ready presentations.
Step 4: Export and share
With the floor plan refined, export in the format the project requires. Polycam supports PDF, DXF, PNG, SVG, and CSV, all available on Business and Enterprise plans.
The DXF export gives architects and contractors clean, layered files that drop directly into AutoCAD, Revit, or SketchUp without hours of retracing. The CSV export lets you drop room-by-room measurement data straight into Excel or Procore for estimating. The PDF works as a polished client deliverable or carrier submission.
Every floor plan also generates an AI-powered spatial report, and any edits in the floor plan are also connected to the spatial report, so you can edit once and see it change everywhere. You can export the floor plans in a variety of formats, including PDF and CSV, containing room-by-room square footage, wall dimensions, window areas, and object measurements. For contractors verifying subcontractor quotes or adjusters documenting claims, this report turns the floor plan into a measurement and verification document.
Edits made in the Floor Plan Editor automatically update the spatial report, so the measurements and areas always reflect the final layout.
Share captures and floor plans with your team through Polycam's Business plan, which includes centralized access, shared workspaces, and custom branding for client-facing deliverables.
Start creating floor plans today
Polycam turns a two-hour manual measure into a ten-minute scan with an editable, exportable, professional-grade floor plan ready to share with team members the same day.
Start a free 7-day Business trial →